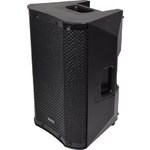
CASA-8A
CASA Active PA Cabinets with DSP, USB/SD and Bluetooth
178.108UK
Introduction
Thank you for choosing a CASA active speaker cabinet as part of your sound system.
This product is designed to provide flexible, powerful and efficient output for a wide range of sound reinforcement applications. Please read this manual to achieve optimum performance from your speaker cabinet and avoid damage through misuse.
- CASA-10A 178.110UK
- CASA-12A 178.112UK
Version 1.0
| Caution: Please read this manual carefully before operating |
|---|
| Damage caused by misuse is not covered by the warranty |
Package Contents
- CASA-series active speaker cabinet
- Mains lead(s)
- User manual
If you find any part is missing or the product has arrived with any problems, please contact your retailer at once.
This product contains no user-serviceable parts, so make no attempt to try to fix or modify this item yourself as this will invalidate the warranty. We recommend you keep the original package and proof of purchase for any possible replacement or return issues.
Warning
To prevent the risk of fire or electric shock, do not expose any of the components to rain or moisture.
Avoid impact to any of the components.
No user serviceable parts inside - refer servicing to qualified service personnel.
Safety
Ensure that the correct mains lead is used with adequate current rating and mains voltage is as stated on the unit
Avoid ingress of water or particles into any part of the housing. If liquids are spilled on the cabinet, stop using immediately, allow the unit to dry out and have checked by qualified personnel before further use
 |
Warning: this unit must be earthed |
Placement
Keep the electronic parts out of direct sunlight and away from heat sources.
Position the cabinet on a stable surface or stand that is adequate to support the weight of the product.
Allow adequate space for cooling and access to controls and connections at the rear of the cabinet.
Keep the cabinet away from damp or dusty environments.
Cleaning
Use a soft dry or slightly damp cloth to clean surfaces of the cabinet
A soft brush can be used to clear debris from controls and connections without damaging them
To avoid damage, do not use solvents to clean any parts of the cabinet.
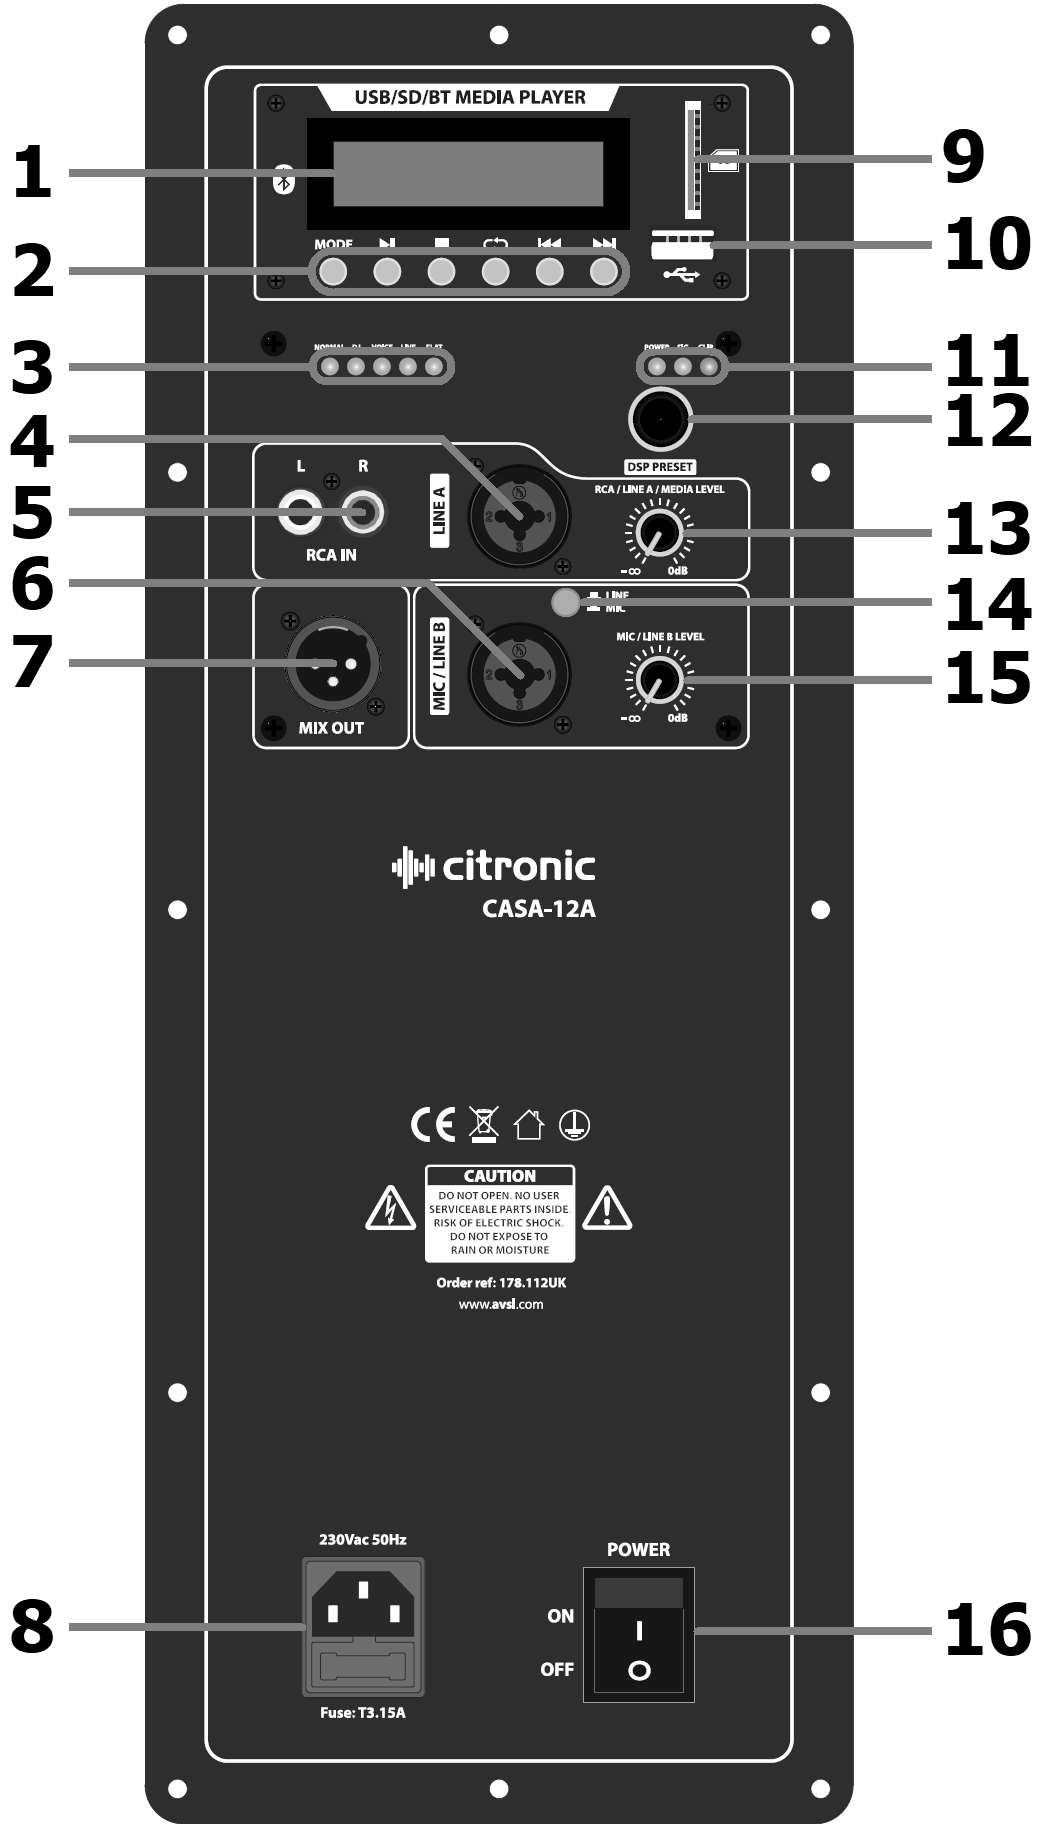
Rear Panel Layout
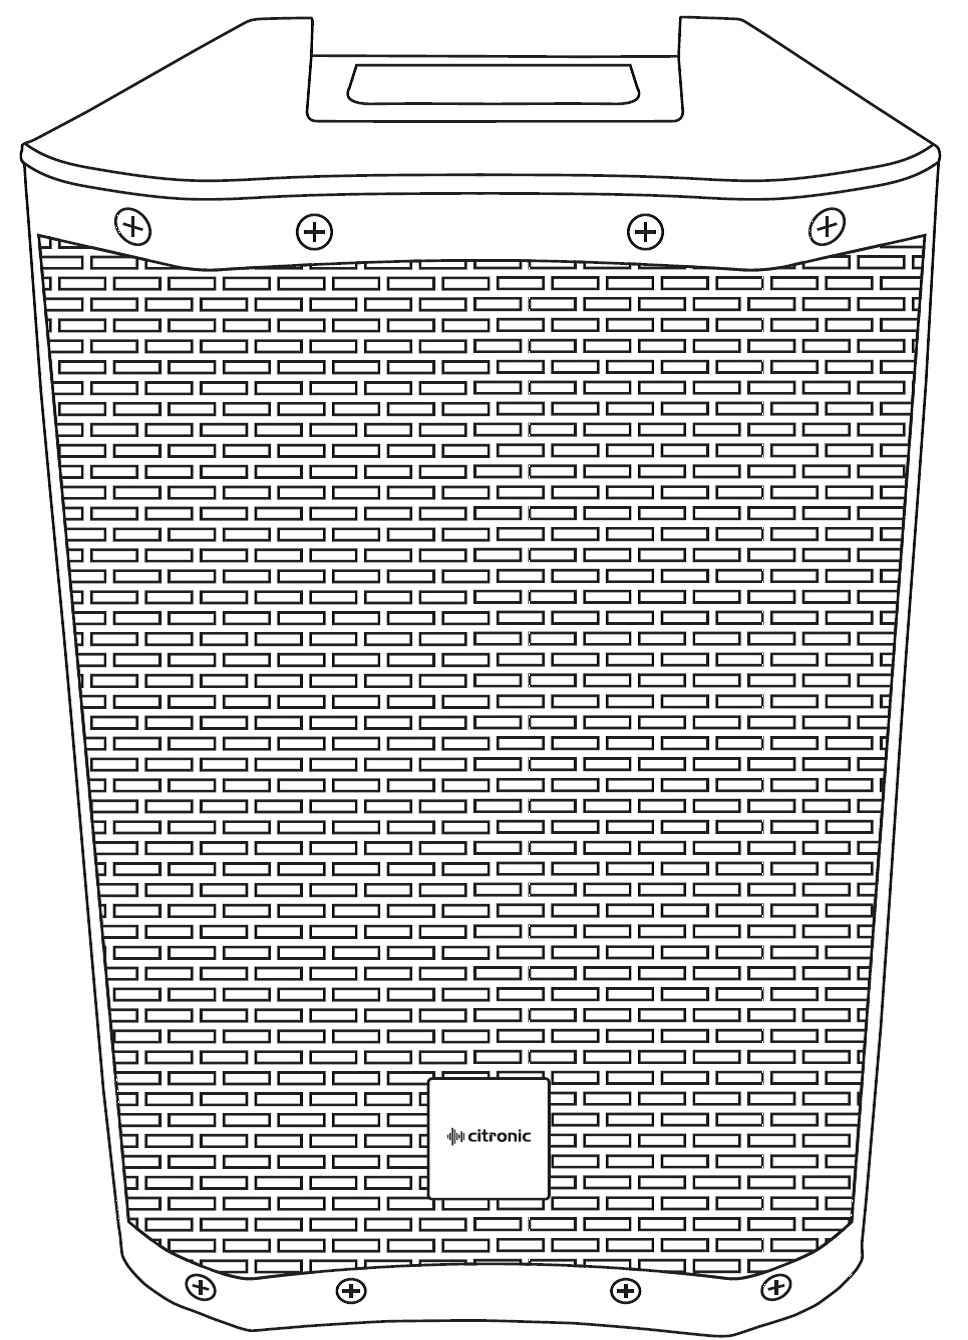
CASA-12A
| No | Function |
|---|---|
| 1. | Media player display |
| 2. | Media player controls |
| 3. | DSP setting indicator LEDs |
| 4. | LINE A input combo Jack/XLR |
| 5. | RCA line input (L+R) |
| 6. | MIC/LINE B input combo Jack/XLR |
| 7. | MIX line output XLR |
| 8. | IEC mains inlet & fuse holder |
| 9. | SD card slot |
| 10. | USB port |
| 11. | Amplifier status LEDs |
| 12. | DSP rotary selector |
| 13. | RCA/LINE A/MEDIA volume control |
| 14. | Input B MIC/LINE level selector |
| 15. | MIC/LINE B volume control |
| 16. | Power on/off switch |
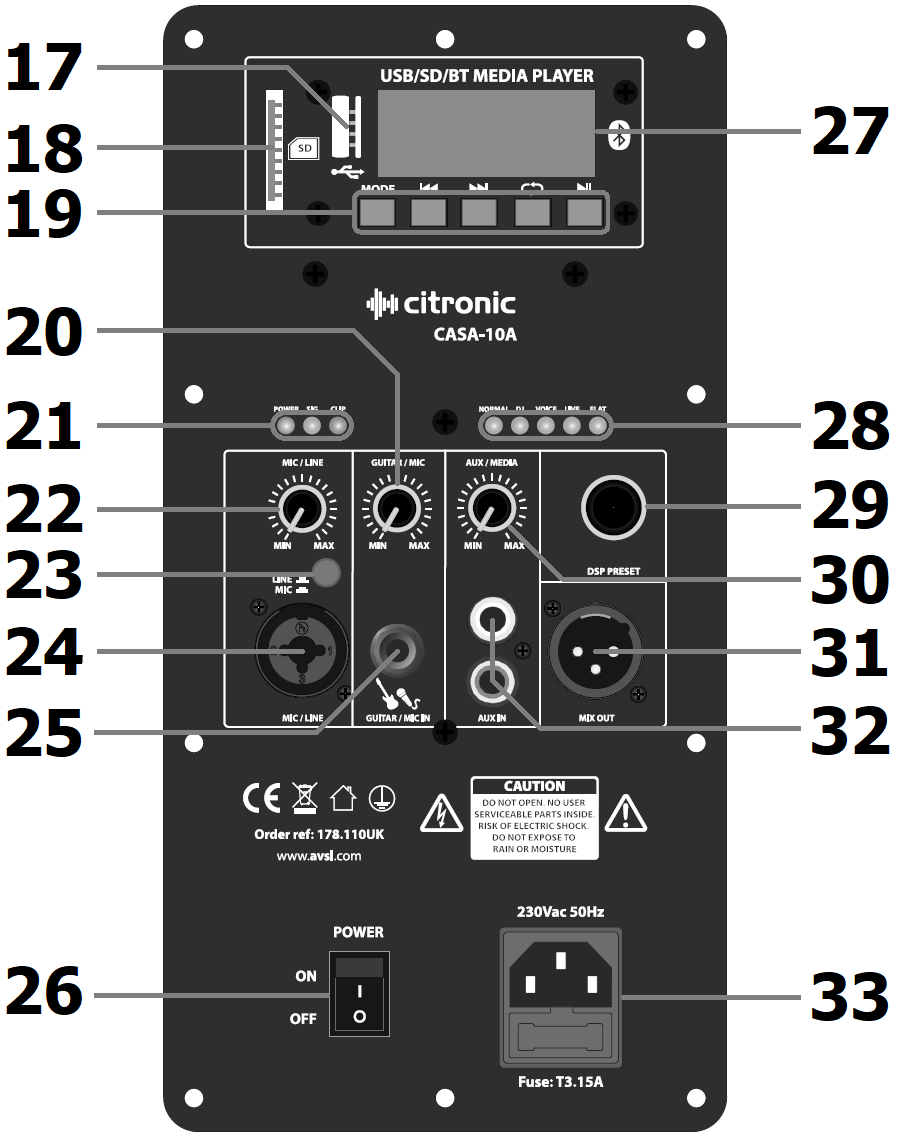
CASA-8A / CASA-10A
| No | Function |
|---|---|
| 17. | USB port |
| 18. | SD card slot |
| 19. | Media player controls |
| 20. | GUITAR/MIC IN volume control |
| 21. | Amplifier status LEDs |
| 22. | MIC/LINE volume control |
| 23. | MIC/LINE level selector |
| 24. | MIC/LINE input combo Jack/XLR |
| 25. | GUITAR/MIC IN 6.3mm jack |
| 26. | Power on/off switch |
| 27. | Media player display |
| 28. | DSP setting indicator LEDs |
| 29. | DSP rotary selector |
| 30. | AUX/MEDIA volume control |
| 31. | MIX line output XLR |
| 32. | AUX input L+R RCA |
| 33. | IEC mains inlet & fuse holder |
Setting Up
Position your CASA active speaker cabinet(s) on a stable surface capable of supporting the load and vibrations from the cabinet or ideally on a strong 35mmØ pole mount or speaker stand with an adequate safe working load to support the cabinet.
Aim the cabinet towards the audience or listeners and not in direct line of sight with any microphones that are connected to the sound system. This is to avoid feedback (howling or squealing caused by the microphone “hearing” itself amplified)
If a mixing console is being used to control input sources, connect the output of the mixer to the CASA cabinet LINE input (4) or MIC/LINE (6, 24) with “LINE” switch selected (14, 23) using XLR or 6.3mm jack connectors. If the system is in stereo, then usually one CASA cabinet will serve the right-side output and another for the left-side output. Normally, the volume of the CASA cabinet LINE input is turned up high and the output will be controlled at the mixer.
For CASA-8A and CASA-10A models, a further input is provided for connecting and additional microphone or instrument (e.g. guitar) to a 6.3mm jack input (25)
If a playback device (e.g. mp3 or CD player) is to be connected directly to the CASA cabinet, this is usually connected to the CASA cabinet AUX input via L+R RCA connectors (5, 32)
If the inputs to the CASA speaker cabinet are to be linked onto a further active cabinet or amplifier, the mix of all MIC/LINE/GUITAR/AUX inputs can be fed from the MIX OUT line output XLR to further equipment (7, 31)
When all necessary connections are made, finally connect the supplied IEC power cable (or equivalent) from the mains power supply to the IEC power inlet on the CASA speaker cabinet, ensuring that the supply voltage is as indicated on the CASA speaker unit (8, 33)
Operation
With all volume controls turned fully down, switch on the power to the CASA speaker cabinet.
The media player display will light up (1, 27), and a status LED will show that power is on (11, 21)
If a mixer is connected to the CASA speaker unit, ensure a signal is present, turn up the mixer output part way and gradually increase the volume of the input that the mixer is connected to for checking the output from the CASA speaker. If the sound is present and OK, turn down the mixer and turn up the CASA speaker to the maximum required output and control the volume from the mixer.
The “SIG” LED will light to show when a signal is present, and a “CLIP” LED should only light briefly on the loudest beats or transients. If this LED lights more continuously, it will be necessary to turn the volume control(s) down to avoid overload (11, 21)
If a microphone is connected directly to the CASA speaker unit instead of a mixer, speak into the microphone whilst gradually increasing the volume of the MIC input until the required sound level is reached.
For playback devices, with a track playing and the playback device volume turned up part way, gradually increase the volume of the AUX or LINE input that the playback device is connected to so that the output can be checked and increase to the required output level.
The CASA-8A, CASA-10A and CASA-12A cabinets have an inbuilt DSP which has 5 optimal settings for different types of input or audio program material: Normal / DJ / Voice / Live / Flat. Although quite self-explanatory, it is worth experimenting with each profile to find the ideal EQ and tone response for each application. Simply turn the DSP rotary selector (12, 29) and the DSP setting indicator LEDs (3, 28) show which setting is active.
Media Player
CASA-8A, CASA-10A and CASA-12A cabinets each have a media player section at the top of the rear control panel. The output of the media player is controlled by the RCA/LINE A/ MEDIA volume control (13) or AUX/MEDIA volume control (30)
Six buttons beneath the display control the media player, as described below.
| MODE | Select USB or SD audio playback or Bluetooth wireless connection modes. |
|---|---|
| PLAY/PAUSE | Play/Pause current track |
| STOP | Stop current track & return to start |
| REPEAT | Select repeat mode: ONE (current track), RDO (random), ALL (all tracks) |
| PREVIOUS | Previous track |
| NEXT | Next track |
To play an audio (mp3 or wav) track from USB or SD media, simply turn up the MEDIA volume control and insert the USB or SD card into the relevant slot at the side of the display. If playback does not begin automatically, press the Play/Pause button or remove the USB or SD device and check the stored files are the correct format before re-inserting the device.
Pressing the Mode button will toggle between USB and SD media (if both are inserted) and Bluetooth wireless connection. To connect a smart phone or other Bluetooth host device, select the Bluetooth mode on the media player, enable Bluetooth on the smart phone (or Bluetooth host device) and search for “CASA-8A”, “CASA-10A” or “CASA-12A” in the Bluetooth menu (depending upon model)
Select this ID and the sending device should pair with the media player in the CASA speaker unit. When connected, turn up the MEDIA volume control part way and any audio playback from the sending device should be heard through the CASA speaker cabinet. Ensure that the sending device’s own volume control is not turned down.
If pairing is unsuccessful or doesn’t result in playback through the CASA speaker unit, check that the correct Bluetooth device ID has been selected and paired successfully and that no other CASA units are set to Bluetooth mode within wireless range (5 - 15m) that the sending device might have connected to.
For USB/SD or Bluetooth modes, the playback controls work in a similar way.
PLAY/PAUSE will play or pause the selected track.
STOP will stop the selected track and return to the start.
REPEAT will repeat the selected track, play all tracks in a random order or repeat all tracks in order.
PREVIOUS will go back to the previous track
NEXT will step forward to the next track
Before powering down the CASA speaker unit, turn down all volume controls to avoid loud noises.
If not being used for long periods, disconnect from the mains power supply.
Specification
| Specification | Value |
|---|---|
| Weight | 8.71kg |
| Dimensions | 435 x 278 x 245mm |
| Inputs | XLR/jack mic/line, 6.3mm jack mic/instrument, L+R RCA line |
| Frequency response | 60Hz - 19kHz |
| SPL max. | 120.0dB |
| Sensitivity | 94dB |
| Output power peak | 800W |
| Output power : max. | 400W |
| Output power : rms | 200W |
| HF driver | 25mmØ (1") Ti compression driver |
| Voice coil | 50mmØ (2") |
| Main driver | 200mmØ (8") |
| Power supply | 230Vac, 50Hz (IEC) |
| Audio source | USB/SD player + Bluetooth receiver |
| Line output | XLR |
| DSP settings | Normal, DJ. Voice, Live, Flat |
Precautions
| CAUTION | ||
| RISK OF ELECTRIC SHOCK DO NOT OPEN | ||
| CAUTION : TO REDUCE THE RISK OF ELECTRIC SHOCK, DO NOT REMOVE COVER (OR BACK) NO USER-SERVICEABLE PARTS INSIDE REFER SERVICING TO QUALIFIED SERVICE PERSONNEL | ||
This symbol indicates that dangerous voltage constituting a risk of electric shock is present within this unit
This symbol indicates that there are important operating and maintenance instructions in the literature accompanying this unit
Safety Notice
- Prior to use, read through this safety guide.
- Pay attention to safety warnings.
- Observe all operating requirements.
- For any items designed for indoor use only, do not operate near water or in humid environments.
- For cleaning, only use a lint-free, dry cloth.
- Install according to the specifications.
- Place away from heat sources or heating appliances.
- During placement, ensure adequate support for the product and access to controls and connectors.
- Do not obstruct any cooling vents or openings and allow adequate space for air flow.
- Use only power connections supplied with the product or suitable equivalents.
- Do not modify the equipment in any way.
- For any mains powered appliances, ensure that the mains voltage is as described in the specifications.
- Keep powered products and batteries away from the reach of children.
- In case of malfunction, water ingress or other damage, consult qualified service personnel.
- Avoid pressure or impact to the housing that may result in damage when transporting or installing this product.
- For any Earthed mains product, ensure that the power supply has a protective Earth connection.
- Keep all packaging materials out of reach of children.
Disposal : The "Crossed Wheelie Bin" symbol on the product means that the product is classed as Electrical or Electronic equipment and should not be disposed with other household or commercial waste at the end of its useful life. The goods must be disposed of according to your local council guidelines.
AVSL (EUROPE) Ltd, Unit 3D North Point House, North Point Business Park, New Mallow Road, Cork, Ireland